静态编译libudev
- 再创世纪·代码厨房
- 2022-01-07
- 297热度
- 0评论
编译静态链接库的目的不再赘述了,之前的文章已经讲了很多次。
这次直接看过程。
1. “理应可以”
源码包目录结构如下图所示:
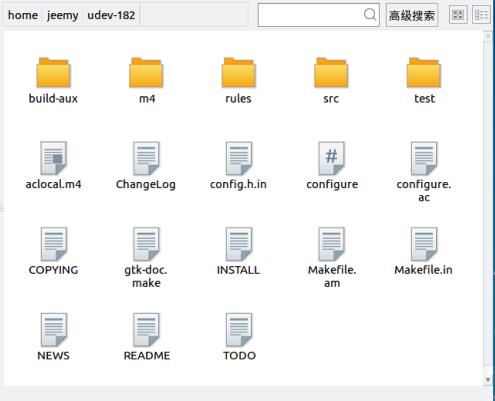
正常来说,按照以下顺序执行命令,理应可以生成想要的库。
- 1. aclocal
- 2. autoconf
- 3. autoheader
- 4. automake --add-missing
- 5. ./configure
- 6. make
- 7. make install
2. “必由之路”
俗话说,编译过程绝不可能一蹴而就(手动狗头),解决报错是一件有趣的事(并不是)。
2.1 aclocal 未找到命令
2.2 automake --add-missing时,报“configure: error: cannot guess build type; you must specify one”
2.3 automake --add-missing 时,报“error while making link: Operation not supported”
2.4 automake --add-missing 时,报“required file 'build-aux/ltmain.sh' not found”
$libtoolize --version
$libtoolize --automake --copy --debug --force
2.5 configure: error: Package requirements (blkid >= 2.20) were not met:
2.6 configure: error: Package requirements (libkmod >= 5) were not met:
原因:libkmod-dev未安装
2.7 configure: error: Package requirements (glib-2.0 >= 2.22.0 gobject-2.0 >= 2.22.0) were not met:
原因:libglib2.0-dev未安装
2.8 configure: error: Package requirements (gobject-introspection-1.0 >= 0.6.2) were not met:
原因:libgirepository1.0-dev未安装
2.9 configure: error: Package requirements (usbutils >= 0.82) were not met
原因:usbutils未安装
2.10 configure: error: cannot open < gtk-doc.make
原因:gtkdoc-tools包不全
2.11 configure: error: gperf is needed
原因:gperf未安装
解决方法:sudo apt install gperf
2.12 make时报错: src/sd-daemon.c:394: undefined reference to `mq_getattr'
在编译时报undefined reference to mq_open、undefined reference to mq_close时,除了要包含头文件#include <mqueue>#include <fcntl>外,还需要加上编译选项-lrt
#include<mqueue> #include <fcntl>都已包含,不需要冗余添加;编译选项增加一个-lrt,解决。2.13 make时报错: (standard input): No keywords in input file!
2.14 make时报错: mtd_probe.h --> error: unknown type name ‘uint32_t’;unknown type name ‘uint8_t’
2.15 make时报错: 找不到 -lgudev-1.0
【以下为2023.4.3补充】
2.16 configure: error: Package requirements (usbutils >= 0.82) were not met: No package 'usbutils' found
2.17 make: src/udevadm-udev-event.o: in function `.L40':
udev-event.c:(.text+0x728): undefined reference to `major'等一系列报错
3. 总结与说明
3.1 最终的configure 指令:
sudo ./configure --build=arm-linux --prefix /home/jeemy/Source/udev-182/Bin CFLAGS="-fPIC -lrt" --disable-keymap --enable-static=yes --enable-shared=nosudo ./configure --build=loongarch64 --prefix /home/jeemy/Source/udev-182/Bin CFLAGS="-fPIC -lrt" --disable-keymap --enable-static=yes --enable-shared=no3.2 关于-fPIC的说明:
-sharedProduce a shared object which can then be linked with other objects to form an executable. Not all systems support this option. For predictable results, you must also specify the same set of options used for compilation (-fpic, -fPIC, or model suboptions) when you specify this linker option.
On some systems, ‘gcc -shared’ needs to build supplementary stub code for constructors to work. On multi-libbed systems, ‘gcc -shared’ must select the correct support libraries to link against. Failing to supply the correct flags may lead to subtle defects. Supplying them in cases where they are not necessary is innocuous.
-fpicGenerate position-independent code (PIC) suitable for use in a shared library, if supported for the target machine. Such code accesses all constant addresses through a global offset table (GOT). The dynamic loader resolves the GOT entries when the program starts (the dynamic loader is not part of GCC; it is part of the operating system). If the GOT size for the linked executable exceeds a machine-specific maximum size, you get an error message from the linker indicating that -fpic does not work; in that case, recompile with -fPIC instead. (These maximums are 8k on the SPARC and 32k on the m68k and RS/6000. The x86 has no such limit.)Position-independent code requires special support, and therefore works only on certain machines. For the x86, GCC supports PIC for System V but not for the Sun 386i. Code generated for the IBM RS/6000 is always position-independent.When this flag is set, the macros__pic__and__PIC__are defined to 1.-fPIC
If supported for the target machine, emit position-independent code, suitable for dynamic linking and avoiding any limit on the size of the global offset table. This option makes a difference on the m68k, PowerPC and SPARC.Position-independent code requires special support, and therefore works only on certain machines.
When this flag is set, the macros__pic__and__PIC__are defined to 2.
也就是说,加了这两个编译选项后,动态加载程序(dynamic loader)加载库后,会通过全局偏移表(GOT)访问所有常量地址。这篇文章,对这个机制有比较深入的研究。对于编译来说,倒是不要求很深入地理解操作系统行为。只要知道带着-fPIC或者-fpic是生成共享库必须的就够了。
3.3 源码文件
udev源码提供下载如下:原始文件包,修复问题2.14的文件包,【2023.4.3补充:修复问题2.2、2.17的文件包】。